Recently I found a really nice small work bench that you place on a
table top, or saw horses, and you have most of the very helpful advantages of a
full size work bench. It is made in
Sweden by Sjobergs and is called a Smart Vise.
The only problem is that it retails for about $139.00. So after looking at it, I determined I could
make one myself.
The first item to get was the mechanism that is the vice on the front
of the unit. As I search for vices on
the internet, I finally found at Lowe's the very vice that I could use. It is made by Irwin Tools, called a
"Woodworking Vice", and was only $19.99. Next I knew I would need some dogs to put
into the holes. I found those at Grizzly Industrial, Inc.,
for only $3.95 a pair (T26311
Grizzly 5/8" Steel Bench Dogs).
So now all I need is some wood.
The one I found for sale
is about 15" x 18". I decided
to make mine 18" wide and 24" deep.
I always start my projects by looking through all my stacks of wood
pieces and select those that I might cut the required size needed. I found two pieces of 3/4" plywood that
would make the bottom and a piece of 1 x 2 for the underneath lip that will butt
to the table top edge.

Now I am basically moving
forward.

I added glue and then clamped the 1 x 2, cut to 18", under the bottom. While that set and hardened, I worked on getting the vice to a point that I could incorporate it into the unit. An old piece of 2 x 6, about 8 1/2" long, was just the start. The back of the vice has 2 tabs that stick out for the sole purpose of attaching it to the front edge of a table top.

I clamped the 2 x 6 into the position, drilled
two 5/16" holes, and inserted 2 carriage bolts through the wood and then the tab. Blow away the wood shavings, place a flat washer,
then a lock washer, and then tightened the nut to secure the two together. Then I noticed that there were 2 counter sink
holes in the metal plate for a couple of flat head screws to even further lock
the two items together, so I opened the vice beyond its maximum and removed the
front plate with the screw bar and the two parallel guides. This allowed me to add those 2 screws.
Next I realized that the
vice will have to be elevated above the surface of the bottom 18" x 24" of the unit, so I
cut two pieces 5 1/2" long and 1" x 1 1/2". These were glued to the underside of the 2 x
6.

The 1 1/2" made the bottom of the vice plate be in alignment with the top surface of the bottom 18" x 24" of the unit.

The 1" width made the pieces fit just between the screw bar and the parallel guide bars.

I added two 3" dry wall screw in the back edge of the 2 x 6 at an angle of 45 degrees such that the screws would help lock the spacers underneath to the 2 x 6. Now I can attach the vice assembly to the bottom 18" x 24" of the unit. This was done by clamping the assembly into place and then countersink

two 1 5/8" screws through the underside of the bottom into each of the spacers glued to the underside of the 2 x 6.

After that, I marked the top side of the 18" x 24" bottom for the 3 boards to use as risers that support the top of the unit. These measures were then transferred to the bottom side. Then I cut three pieces 24" long using a 3/4" board, and ripped those down to 2" wide. Finally I cut one of the 24" shorter to be the middle riser. It only needed to be 18 1/4".

I set the risers on edge,
placed the unit upside down on top of the risers, position carefully the 3
risers, and drilled countersink holes for the many 1 5/8" screws.

Flipped the unit back
over and now it is ready for the two pieces 18" x 24" of 3/4" plywood that make the
work surface.

I added a short piece of
2" wide between the center riser and the one on the right to make a pocket
for any accessories. Before adding the
base 18" x 24" of the top, I marked the front area of the base to cut out a
rectangle about 8 1/2" x 5 1/2" so the base would rest on the risers and allow the 2 x 6 attached to the vice to fit within the cut out rectangle. I
checked the alignment of the two 18" x 24" pieces by standing my framing square on edge and butted to the
edge of the bottom 18" x 24". Then I drilled countersink holes for
the 1 5/8" screws, just as I did for the underside of the bottom. With that attached with screws, I checked the final work
top and realized the head of the carriage bolts should have been recessed, so
at this point I had to remove enough from the underside of the very top so
there was a cavity to prevent the carriage bolt head from causing a problem.

With a DREMEL tool and a sanding cylinder, I made the two cavities necessary for the top to fit correctly in the front underside edge.
Next I used a wide blade putty knife and a lot of wood glue. I poured glue and spread all over the top of the 18" x 24" surface I had just attached. Then the underside of the final top.

Now the two pieces of 18" x 24" can be sandwiched together and clamp all edges. I left this to dry for at least 24 hours.

In preparation for the holes to be drilled for the dogs, I gave the unit a good sanding and two coats of water based polyurethane. This will help make a cleaner cut when drilling the holes for the dogs. While that dried, I wanted to add cheeks to the inside of the vice, so I cut a 3/8" piece of plywood to fit the back.
.JPG)
Using a foster bit, I drilled a 1/2" dia. about 1/4" deep into the piece and hot glued a rare earth magnet so this piece could be easily removed, but would stay in place when needed.
.JPG)
For the front jaw, I sat a 12" piece of 2 x 4 to rest on the two parallel guide bars and realized that it was taller than the work surface.
.JPG)
This works out fine because I will not have to drill holes for dogs into this piece. It is attached with two 1" screws through the holes provided by the designer of the vice.
Now the measures for the
holes to be drilled for the dogs. Since
the maximum opening of the vice is now been reduced from 5 inches down to about
3 1/2 because of the two cheeks I inserted,
.JPG)
I used a red pencil to mark at 3 1/4" from the front on the right side edge. Then another mark every 3 1/2" to the back. Then the same on the other left side edge. I put a 5/8" drill bit in my drill press, making sure that the bit had those 2 short ears on the outer edge of the blade so they cut a circle before the blade actually cuts into the surface. This will give the best clean hole. Next I placed an auxiliary fence on the table of my drill press with some tape on it aligned with the bit.

Using my framing square I positioned the fence 4 1/2" from the tip of the bit, and marked the tape with the red pencil for a reference point. I removed the front jaw of the vice to avoid problems, sat the unit on the table of the drill press, and

aligned the red mark on the outer edge of the unit with the red mark on the tape stuck to the auxiliary fence and drilled. You'll need a piece of 3/4" to slide under the unit when drilling the two holes closest to the front edge. Once finished, I slid the unit to the next mark and continued. Turn the unit around and do the same for the other side.

I thought I was finished and ready to use the unit, but that pocket I made for accessories was very awkward to get to with my hand. As I looked at the unit I realized there are cavities on both sides created by the risers. So I dug around in my mountains of junk and found an old hot plate. You know the kind that you put on a buffet table, plug into the wall, and sat a casserole on at a pot luck supper to keep the food warm.

Mine died many years ago, but it had a top made from sheet metal. I cut the width I needed to make a drawer and kept the length.

Using my 30" brake from Harbor Freight, I was able to bend the metal into the continuous side-bottom-side that I needed.
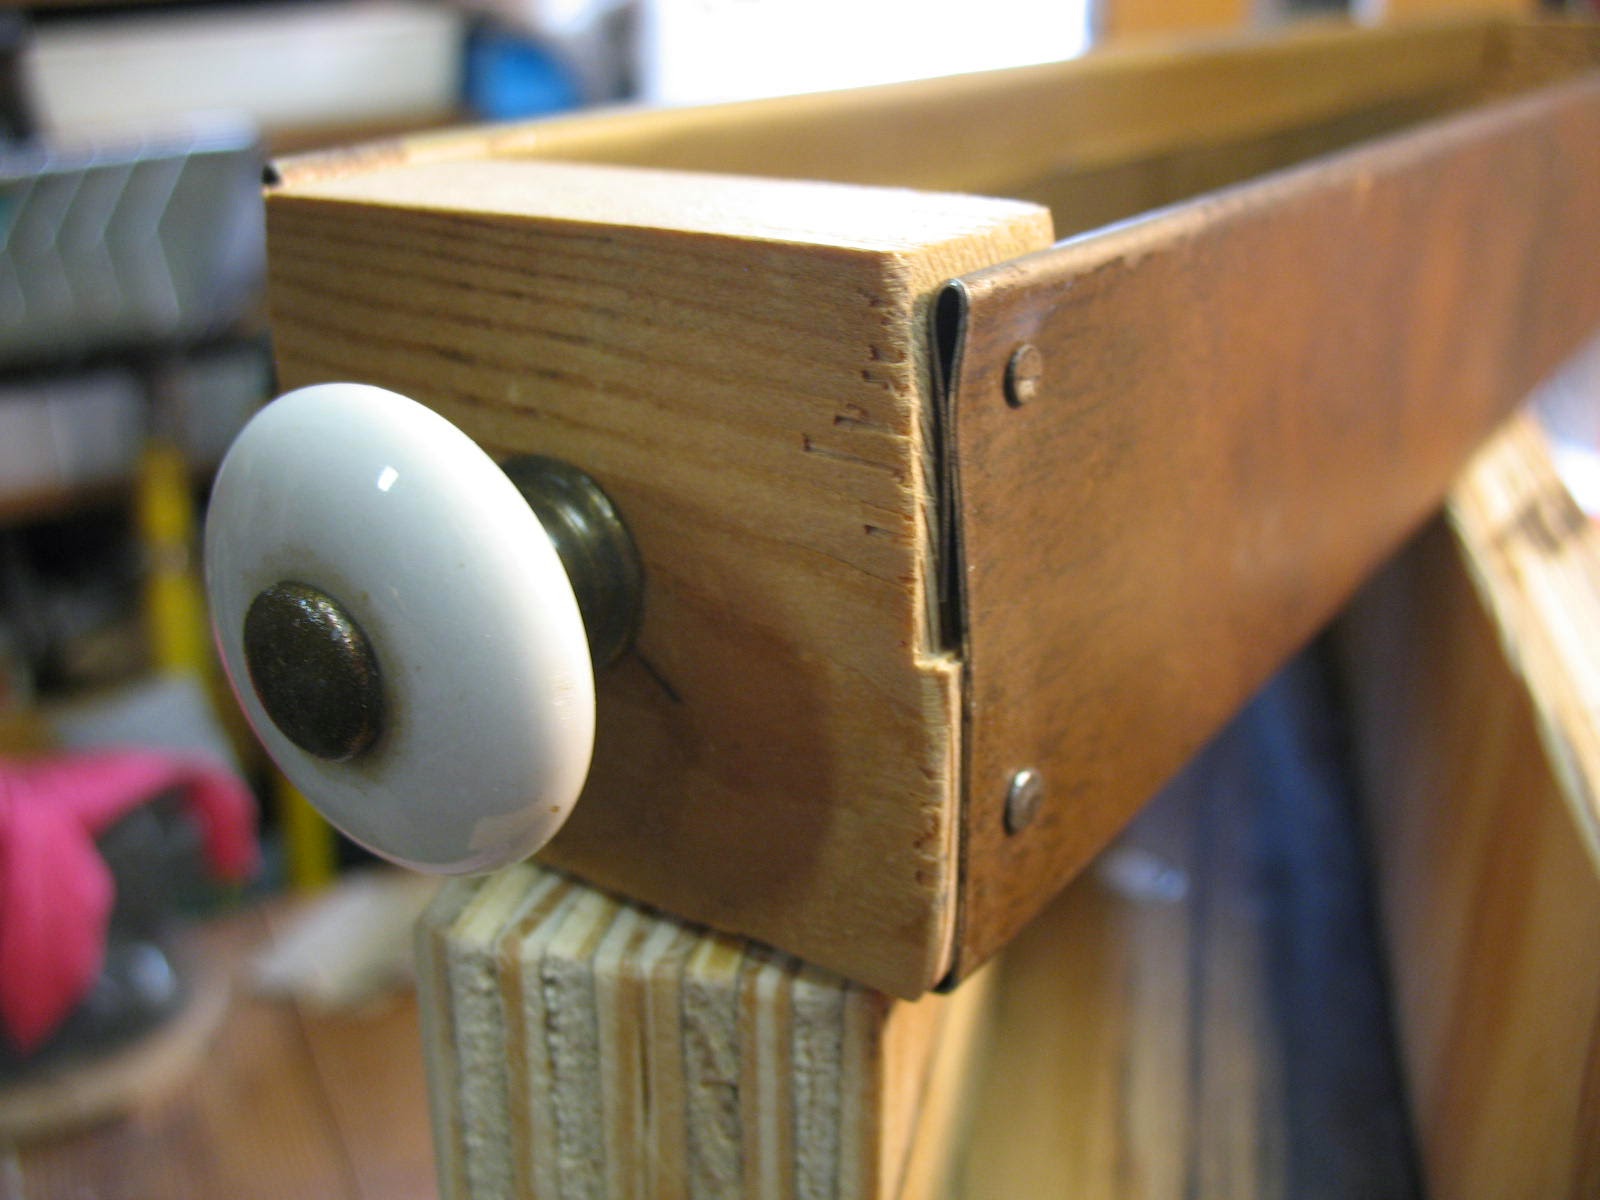
Then I cut two blocks to insert at each end that would be the front and the back of the drawer, and added a knob to the front. I drilled two 3/32" holes on each side of the inserts through the metal and drove small 3/4" nails to hold the end in place.

This worked out just fine and has room for what I need. I stood the unit on its left edge and
.JPG)
drilled holes for two more of my rare earth magnets. Also I glued a stop block at the back for the drawer to butt against.

This is just what I needed. My drawer is safe and secure, out of the way, and easy to get to for access. The magnets really do hold it securely.

Dude - I'm impressed! I was going to buy this vice to attach to a new workbench I just built. I was going to attach it directly to the front of the benchtop frame. I'll have to seriously consider this. Well done!
ReplyDeleteEd
Love it. I will build this as well. Exactly what I have been looking for.
ReplyDeleteSantiago
Nicely written article. Thanks for posting.
ReplyDelete